

How to register your app for Office 365 with OAuth 2.0 authentication
Before your application can start accessing Office 365 mailboxes using Exchange Web Services (EWS), IMAP, POP3, SMTP or Microsoft Graph API with OAuth 2.0 authentication, you first have to register it in Azure Portal and configure it properly.
The following steps describe how to register a desktop or mobile application for delegated access, which is suitable for desktop, mobile, or web applications with a single signed-in user present. For unattended applications, such as services or daemons with no user present, see Office 365 with OAuth 2.0 in app-only mode. The steps below only apply to applications using delegated access.
Log into Azure Portal. If you don't have an account there yet, create it and set up a tenant.
If you administer more than one tenant, use "Directory + subscription" filter to select the tenant in which to register an application.
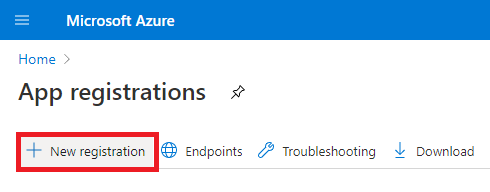
At Azure Portal homepage, select "Azure Active Directory". Then, in the left menu, click "App registrations". Azure Portal is constantly changing, so if you cannot find this, use the search bar.
- On "App registrations" page, click "+ New registration".
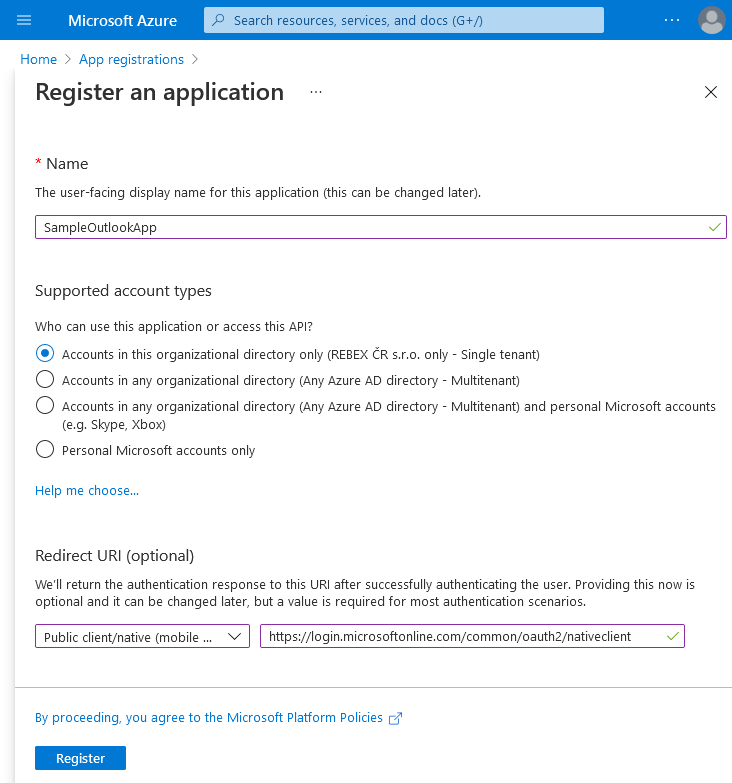
- In the "Register an application" form, enter an app name and specify which kinds of users are going to use it. For desktop or mobile apps, choose Public client/native (mobile & desktop) and enter the Redirect URI:
https://login.microsoftonline.com/common/oauth2/nativeclient
For web apps, you would specify an URI of your own. Finally, click "Register".
Now that you registered the application, note its assigned Application (client) ID - you'll need it in your application code.
Next, specify appropriate permissions. First, select "API permissions" in the left menu, and click "+ Add a permission".
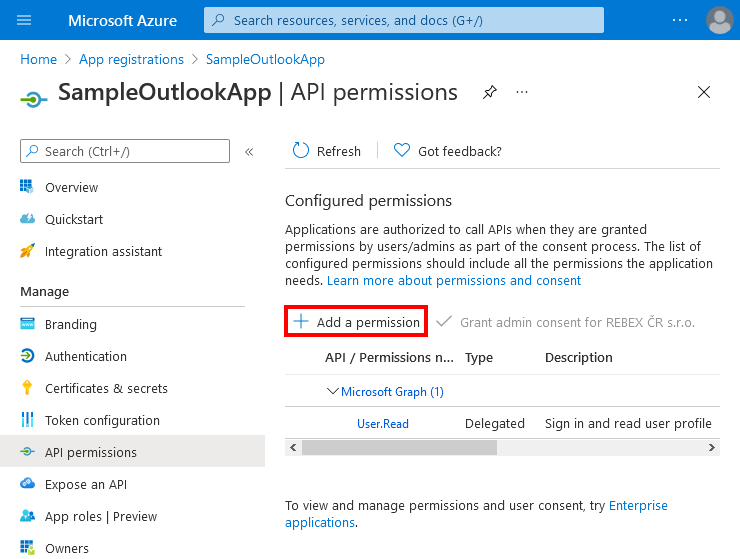
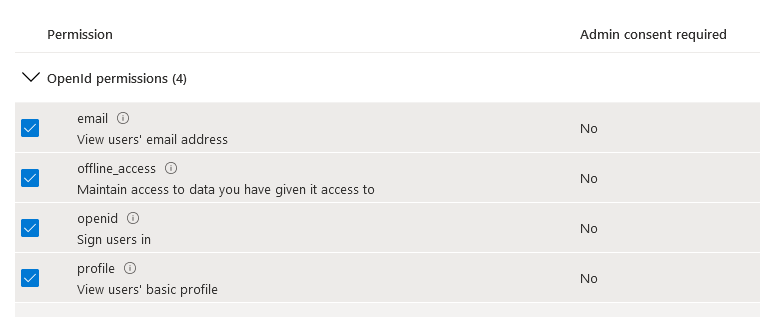
- Select "Microsoft Graph", then choose "Delegated permissions". You would probably want to add
"openid","profile","email"and"offline_access"permissions from the "OpenId permissions" group (check out the next blog post for more information on them).
Depending on the protocol you are going to use, optionally add
"EWS.AccessAsUser.All"(from 'EWS' group),"IMAP.AccessAsUser.All"(from 'IMAP' group),"POP.AccessAsUser.All"(from 'POP' group),"SMTP.Send"(from 'SMTP' group). Once you selected all required permissions, click "Add permissions" to add them.If you are going to use Microsoft Graph API, you probably won't need
email,openidandprofilepermissions. Following are permissions you might want:User.Read- for reading user's profile info.Mail.Read- for reading mails.Mail.Send- for sending mails.Mail.ReadWrite- for manipulating mails.
Now you have registered an application for Office 365, and received its client ID. In the next blog post, we will show how to actually use this information to access Office 365 mailboxes using EWS, IMAP, POP3 or SMTP with Rebex Secure Mail or Rebex Graph.