

How to use OAuth 2.0 authentication for Office 365 with Rebex Graph in delegated mode (with a signed-in user)
OAuth 2.0 authentication is quickly becoming a must-have feature for applications accessing cloud-based email services such as Microsoft 365 (formerly Office 365) Exchange Online (formerly Outlook Online). And although setting it up is relatively simple, there are many steps where things can easily go wrong.
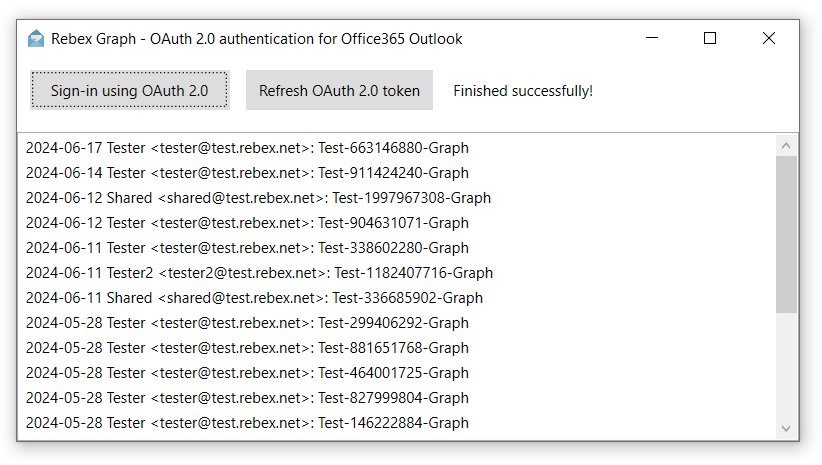
In this article, we will show how to implement a .NET desktop WPF application that uses Rebex Graph component to access a Microsoft 365 mailbox via Microsoft Graph API. Apart from Rebex Graph and a JSON parser the application does not rely on third-party libraries.
If your application is a service/daemon with no user present, see Rebex Graph with OAuth 2.0 in unattended (app-only) mode instead.
You can get our sample source code from Rebex Extras repository on GitHub straight away, and use the rest of the article as a guide to how it works.
Quick overview
The sample application implements the whole OAuth 2.0 authorization code flow and don't rely on an external library for this. Another option is to use Microsoft.Identity.Client package - in that case, you might prefer another set of sample apps that use that API instead.
But even if you end up using Microsoft's API, this article is still useful, because the prerequisites and the final steps are the same, and it's useful to understand what's actually going on under the hood. The underlying logic is the same, Microsoft.Identity.Client just adds more abstraction layers and performs actions described in steps 5, 6 and 9 under the hood.
Before you actually run the application, make sure you have all the prerequisites:
- Register your application in Azure and grant it appropriate permissions.
- Choose a suitable "tenant".
- Determine scope of permissions you need.
- Consider additional options.
Then, in the actual application, you would do this:
- Direct the user to an authentication URL (via embedded browser).
- Retrieve the authentication code and redeem it for an access token.
- Access the mailbox using Graph.
- Refresh the access token (if needed).
This applies to desktop Windows applications using delegated authentication. That simply means applications with a single signed-in user present. Most mobile applications would use the same approach as well.
Note: For applications with no signed-in user present (such as services or daemons), the process is a bit different, and the application needs to be configured for unattended (app-only) authentication. This is outside the scope of this article - see Rebex Graph with OAuth 2.0 in app-only mode instead.
Now, let's get started:
1. Register your application with Microsoft
Before you can use OAuth 2.0 authentication for accessing Office 365 mailbox via Microsoft Graph API, you have to register your application with Azure Active Directory and configure it properly.
During the process, you will obtain your application's Client ID, which is a GUID that uniquely identifies your application. You will also specify a tenant and scope of permissions (more on these below).
2. Specify a suitable "tenant"
You also have to specify what kinds of Microsoft users are going to use
your application. This means choosing a suitable Tenant ID value that corresponds
to your application registration ("Supported account types" in the app registration form).
It will usually be common (users with personal Microsoft accounts or work/school accounts),
organizations (only users with work/school accounts), or consumers (only users
with personal accounts).
Alternatively, if you only wish to allow users from your organization, it could be a domain name or a GUID (see the endpoints documentation) for details.
In our sample applications, we used organizations, but you can modify that easily.
3. Determine scope of permissions
Before you can direct a user to Microsoft's server to authorize your app, you also have to determine which kinds of scopes (permissions) to actually ask for.
Microsoft identity platform's scopes are not exactly trivial, but for the purpose of mailbox access, only few of them are needed.
Scopes for OAuth 2.0 access token:
"profile"- This one is needed to retrieve the user name. It's not needed for this sample."email"- This is not required, but might be useful."openid"- If you requestprofileoremail, you'll have to include this as well to retrieve the JSON Web Token that contains that information."offline_access"- This permission makes it possible for the application to keep accessing the mailbox even when the original access token expires after an hour. Withoffline_access, the application receives a refresh token which can be used to obtain a new access token.
Scopes for Microsoft Graph API:
"https://graph.microsoft.com/User.Read"- Required for reading user's profile info."https://graph.microsoft.com/Mail.Read"- Required for reading mails."https://graph.microsoft.com/Mail.Send"- Required for sending mails."https://graph.microsoft.com/Mail.ReadWrite"- Required for manipulating mails.
If you want to keep configuration simple, you can just use single .default scope:
"https://graph.microsoft.com/.default"- Requests all permissions defined in app registration (cannot be combined with other"https://graph.microsoft.com/"scopes).
Make sure that you actually granted the required permissions to your application in Azure Portal.
4. Consider additional options
You might also wish specify prompt type, which determines the type of required user interaction. The following values are available:
""- This is the default mode. The authentication server will not request the credentials if the user has already signed in."login"- The authentication server will always request user's credentials."none"- The server will never ask the user for credentials, which means this will only work once the user has already signed in."consent"- This will explicitly ask the user to grant requested permissions to the app (even if he already did before)."select_account"- This will present the user with account selection dialog, which can be useful for users with multiple Microsoft accounts.
For detailed information about prompt types, see the documentation.
Another option that varies from app to app is redirect URI. This indicates where the authentication server should redirect the user once successfully authenticated (or failed). However, for the purpose of desktop or mobile application with an embedded browser, we can simply use a special URL that exists specifically for this purpose.
In our sample app, this special URL is used by default.
5. Direct the user to an authentication URL
Once the application has all of the information above (put them here), it's ready to ask the user to grant the required permissions to access their Office 365 mailbox. It does so by opening a window with an embedded browser for the user, and points it to an URL at Microsoft's authentication server.
In our sample app, we implemented a OAuthAzureAuthorizationWindow class for this
purpose, and initiating the process is very simple:
// create a Window that handles OAuth2 authorization
var authenticationWindow = new OAuthAzureAuthorizationWindow();
authenticationWindow.Owner = this;

// specify the kind of authorization we need
authenticationWindow.ClientId = ClientId; // application's client ID
authenticationWindow.TenantId = "organizations"; // kinds of users to allow
authenticationWindow.PromptType = ""; // prompt type to use
authenticationWindow.Scopes = Scopes; // scope of permissions to request

// perform the authorization and obtain the credentials
var credentials = await authenticationWindow.AuthorizeAsync();
The source code for OAuthAzureAuthorizationWindow class comes with the sample app
as well, and can be easily customized. This is what the AuthorizeAsync
method actually does:
// get redirect URI and determine expected authority
string redirectUri = RedirectUri ?? OAuthAzureCredentials.DefaultRedirectUri;

// create an instance of OAuthAzureCredentials helper class
_credentials = new OAuthAzureCredentials(ClientId, TenantId, PromptType, redirectUri, Scopes);

// create task completion source for the whole action
_taskCompletion = new TaskCompletionSource<OAuthAzureCredentials>();

// Direct the user to authorization endpoint.
// Once completed, the application will receive an authorization code.

// show the window and navigate to authentication URI
Show();
webBrowser.Navigate(_credentials.AuthorizationUri);

// return task that will finish on succcess or failure
return _taskCompletion.Task;
The OAuthAzureCredentials helper class (source included) encapsulates the OAuth 2.0 authentication
logic, while OAuthAzureAuthorizationWindow class adds WPF-specific bits - mostly
the embedded browser window provided by .NET's WPF WebBrowser class.
6. Retrieve the authentication code and redeem it for an access token
Once the user has authenticated to Microsoft's server and granted us permissions, the browser window will be directed to an URL that contains an authentication code. This is essential, as this is what the application needs in order to obtain an OAuth 2.0 access token for accessing Office 365 mailboxes.
Our WPF authentication window class grabs the code from the redirected URL's query string
and calls OAuthAzureCredentials's RequestAccessTokenAsync method to redeem it:
// get query part of the browser URL
var query = System.Web.HttpUtility.ParseQueryString(e.Uri.Query);

...

// get authorization code from the supplied URL
string authorizationCode = query["code"];
if (authorizationCode == null)
{
    // we are not on the final authentication page yet...
    return;
}

// The user has granted us permissions, and we received an authorization code.
// Next, we will exchange the code for an access token using the '/token' endpoint.

await _credentials.RequestAccessTokenAsync(authorizationCode);

// close the window and finish the successful asynchronous authentication request
Close();
_taskCompletion.SetResult(_credentials);
And this is what actually goes on inside the RequestAccessTokenAsync method:
// construct the request body
string requestBody = string.Format(
    CultureInfo.InvariantCulture,
    "grant_type=authorization_code&code={0}&scope={1}&redirect_uri={2}&client_id={3}",
    authorizationCode,
    _scopes,
    Uri.EscapeDataString(RedirectUri),
    _clientId);

// send it via POST request and receive response
string responseJson = await HttpPostAsync(_tokenEndPoint, requestBody);

// deserialize JSON response
var response = DeserializeJson(responseJson);

// get OAuth 2.0 access token
AccessToken = GetStringValue(response, "access_token");
...
Here, we construct an HTTP POST request and send it to an endpoint at Microsoft's server
(the actual URL is https://login.microsoftonline.com/{tenant}/oauth2/v2.0/token,
where {tenant} is the tenant ID, as explained above).
The server will reply with a JSON response, which contains not only the OAuth 2.0 access token, but also additional information, such as user name, e-mail, or refresh token (based on the scope of permissions requested).
To parse the JSON response, we used Microsoft's new JSON API,
but you can easily use the popular Newtonsoft.Json package
as well - just add a reference to it, uncomment the relevant line of code
in DeserializeJson method (and remove MS API code).
7. Access the mailbox using Microsoft Graph API
Now that the application finally has the access token, it can access the user's mailbox at graph.microsoft.com
via Rebex Graph component.
It's very straightforward:
// connect to the server
var client = new Rebex.Net.GraphClient();
await client.ConnectAsync();

// authenticate using the OAuth 2.0 access token
await client.LoginAsync(_credentials.AccessToken);

// do something
GraphFolderInfo folderInfo = await client.GetFolderInfoAsync(GraphFolderId.Inbox);

// or something else
GraphMessageCollection messageList = await client.GetMessageListAsync(GraphFolderId.Inbox, ...);
...
8. Refreshing the access token (if needed)
The access token expires in one hour. If the application needs to keep accessing
the mailbox for longer periods of time without asking the user to authenticate again,
it also has to take care of refreshing the access token. To be able to do this,
it must have been granted the offline_access scope.
To refresh the access token, application calls the RefreshAccessTokenAsync method,
which again constructs a relevant HTTP POST request and posts it to an endpoint at
Microsoft's server. The server responds with a new access and refresh tokens:
// construct the request body
string requestBody = "grant_type=refresh_token&client_id=" + _clientId + "&refresh_token=" + RefreshToken;

// send it via POST request and receive response
string responseJson = await HttpPostAsync(_tokenEndPoint, requestBody);

// deserialize JSON response
var response = DeserializeJson(responseJson);

// update OAuth 2.0 access token and refresh token
AccessToken = GetStringValue(response, "access_token");
RefreshToken = GetStringValue(response, "refresh_token");
What next?
We tried to make the sample code simple to read and reuse, and although we utilized
.NET 4.5's await/async extensively, the code can be easily converted to
.NET Framework 3.5 or 4.0. Just make sure the embedded browser on the target platform
supports TLS 1.2, otherwise the user would not be able to authenticate. Actually,
we have already converted the code for you.
You might also want to consider more options
such as domain_hint, state or code_challenge. These are not required for desktop
apps (yet), but it might be a good idea to already take advantage of them for the extra
security they offer.
Another option to consider is to discard our simple OAuth 2.0 helper classes and use Microsoft.Identity.Client API instead. This is available for .NET 4.5 or later, and makes it possible to perform the whole process without the need to delve into the internals. It's a powerful API, but also somewhat complex, and seemingly simple actions might be hard to figure out. But once you get it working, you get all the latest features with no extra effort. If you prefer this option, we already have a ready-to-use sample apps as well.