

HOWTO: Configure Network in Windows Mobile / PocketPC Device Emulator
When Microsoft Visual Studio 2005 or 2008 is installed with .NET Compact Framework support, a part of the installation is a mobile device emulator that is very useful for testing and debugging .NET CF applications. Unfortunately, network access is not enabled in the emulator by default. Configuring it involves installing additional software and the whole process is complicated enough to cause a lot of confusion. Because of this, we have written the following guide.
Step A. Configure the device emulator
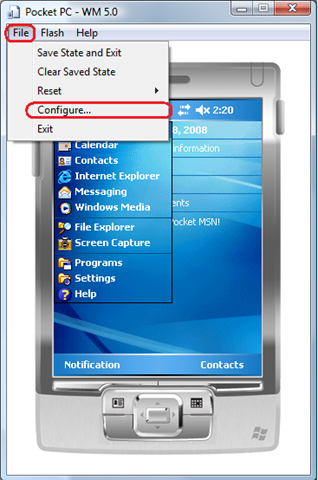
- In the emulator menu, go to “File- >Configure”.
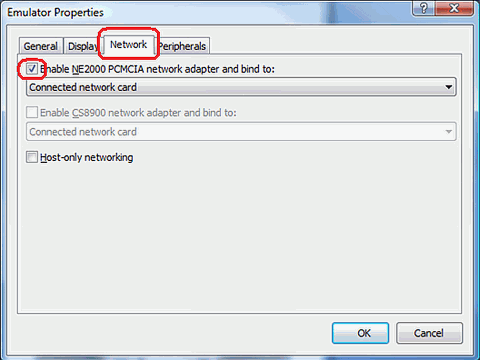
- Click the “Network” tab.
- Check the “Enable NE2000 PCMCIA network adapter…” checkbox.
- Select “Connected network card” in the list below the checkbox.
- Click “OK”.
- If no error dialog appears at this point, continue directly to Step C. Otherwise, read instructions for Step B below.
Step B. Install the Virtual PC Network Driver
Network adapter emulation is not working by default after installing Visual Studio 2005 because a VPC Network Driver is not a part of the installation. That’s why the following dialog usually appears after completing Step A above:
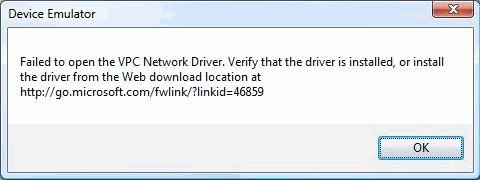
VPC Network Driver is a network device driver that comes with Microsoft Virtual PC and is required by Visual Studio's device emulator as well to be able to bind to a physical network adapter in your computer. Few years ago, Microsoft used to distribute the driver as a small package at the URL from the error dialog above. Unfortunately, this is no longer available and the URL now redirects to Virtual PC 2007 download page that is much larger. If you don’t mind installing Virtual PC (recommended), this is not an issue, but in case you would only like the driver, you can get it from the “c:\Program Files\Microsoft Virtual PC\Utility\VMNetSrv” folder once Virtual PC is installed.
Step C. Configure the emulated mobile device
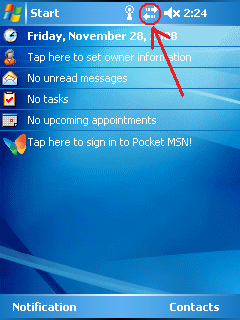
1. Check the emulator screen to see whether the emulated network adapter works – if you see the  icon, the network adapter works fine. If you see the
  icon, something is still wrong - go back to Step A and make sure everything was configured correctly.
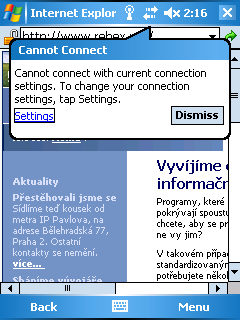
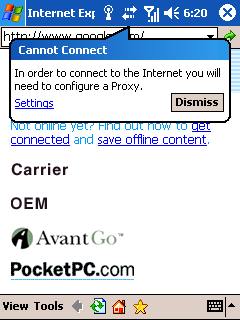
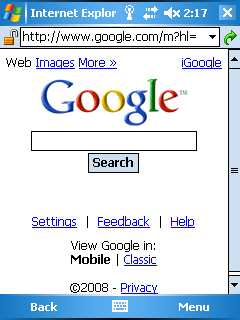
2. Even though the network adapter is enabled now, you may still be unable to access the Internet – start Internet Explorer and try viewing a well-known website. You may get one of the following error messages, depending on your Windows Mobile version:
3. If you are unable to access the Internet (this assumes that you are actually able to access the Internet from your workstation, of course) and you can also see the  icon, click it and choose that the network card connects you to “The Internet” instead of “Work” – you should be able to access the internet now. If you can’t see the icon, follow the steps below.
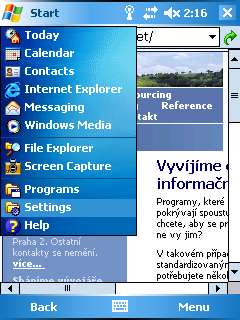
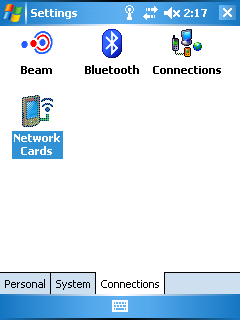
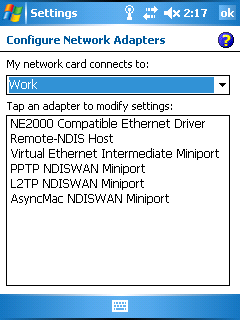
4. Tap the “Start” menu and select “Settings”. Then tap the “Network Cards” icon.
5. Change the “My network card connects to” value from “Work” to “The Internet”.

6. Internet should work now – give it a try!
7. If it still doesn't work, consult your network administrator. The network adapter is configured to use DHCP by default to get a network address, which might not work on high-security corporate networks. In this case, an IP address will have to be assigned manually (in the “Configure Network Adapters” dialog above – tap “NE2000 Compatible Ethernet Driver” in the list) by the network administrator.
Done!
Once this is done, you should also be able to access your local network and the Internet from the emulated device and from Rebex components for running on it, such as Rebex FTP/SSL or Rebex SFTP. If anything is still not working, please let us know!